

This hexrotor frame is a CineStar 6, and has been the target vehicle for my FFv1.1 motor controllers, which so far have only been bench-tested on its motors and flight tested on a smaller quadrotor. The CineStar 6 and Cinestar 8 can do some real magic when combined with high-end HD video cameras. Here's the latest demo reel showing off some of the camera stabilization and rock-solid flight control they can achieve. (Embedding the video wouldn't do it justice - so go click the link!)
By contrast, my CineStar 6 is going to be a crude test mule for the motor controllers. For example, I may set the record for the highest airframe cost to flight controller cost ratio since I'll be using the same $15 KK Mulicontroller from HobbyKing that I've been using for Kramnikopter. I've already zeroed the gyros and calibrated the ESCs to this controller, and it saves this information in the ATmega328's EEPROM. So, even though I have to write new hexrotor firmware to the flash, I keep my calibration settings.
 |
| KK board, receiver, and six FFv1.1s ready for action. |
Yes, the KK board can do hexrotor control! You have to find the firmware, which is not an easy task if you start from HobbyKing. But, the latest version is available at the KK Multicopter site here. "XXcontroller KR v.2.0" seems to have all the firmwares in a single zip file, so you can find the configuration you need and upload it using whatever AVR programming tool you have. The C source isn't as up-to-date (I could only find v1.4 on that page), but it was still interesting to skim through.
Since the point is to test the ESCs, I wasn't particularly concerned about weight while I was putting together the power system. The Cinestar 6 would normally fly with a 4S, 6.2Ah lithium polymer battery that weigh 580g. Instead, I loaded it up with a 6S, 6.6Ah lithium iron phosphate pack that's just shy of 1.5kg. I also added a 100A contactor and some massive power distribution cables:
 |
| Battery pack, contactor, and power distribution bus. |
The contactor is run from a separate 4S, 1.8Ah battery that also powers the receiver. If the receiver loses signal, the contactor opens and the battery is physically disconnected from the motor controllers. This gives me a way to physically disarm the power system before approaching the hexrotor to unplug the battery or adjust something. I trust this a lot more than the KK board's software disarming feature, but if I were concerned about weight, a mechanical contactor would probably be out of the question. Small 50A automotive relays might be okay, though.
Since this was the first test flight of the FFv1.1 boards on the CineStar 6 frame, I wanted to stay near the shop so I could easily reprogram or fix any problems. But, testing a huge hexrotor indoors means you will have to be in the same room with it...


Since this was the first test flight of the FFv1.1 boards on the CineStar 6 frame, I wanted to stay near the shop so I could easily reprogram or fix any problems. But, testing a huge hexrotor indoors means you will have to be in the same room with it...

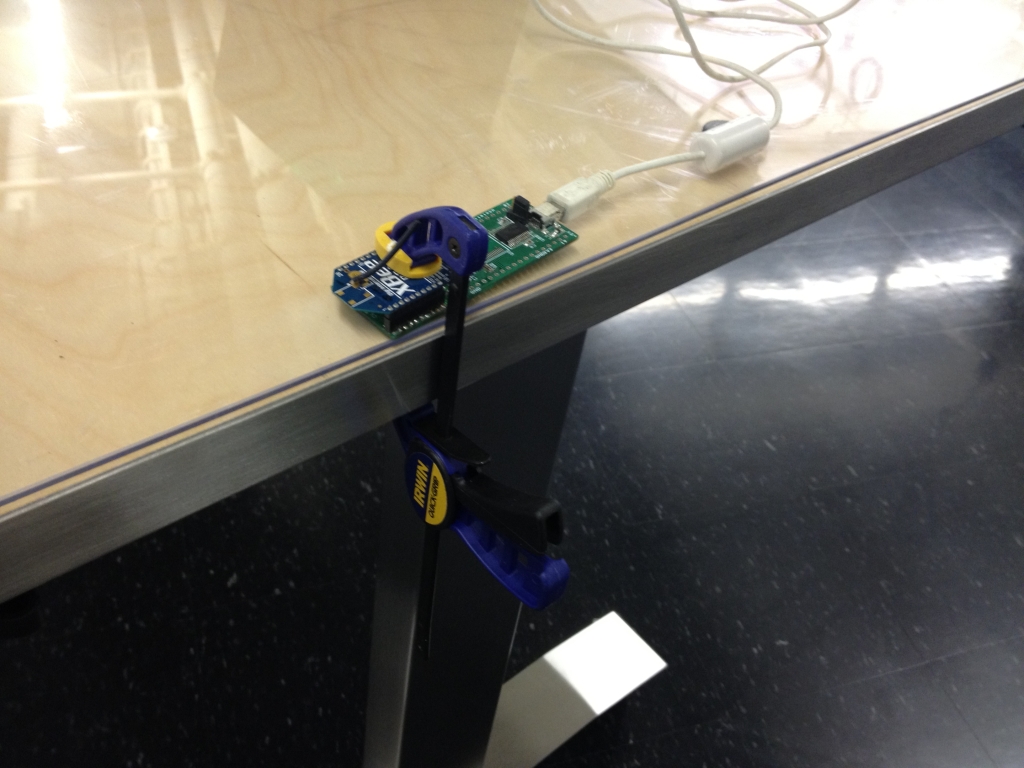
...unless you happen to work in a giant fishbowl with enough glass walls and doors to make you want to start writing equations on them in soap and muttering to yourself about secret codes hidden in your digital controls textbook. I set up my XBee receiver and data logging software so I could collect data from one of the six motor controllers. The XBee adapter board I use is rather old, though, and requires some manipulation to work properly:
At that point, I was all set to fly. Here's a video of the first couple of test hops:
In the first clip, the gains are a little on the high side, causing small oscillations which could go unstable when flying in ground effect or if a gust of wind disturbs the system. Turning the gains down made the flight less oscillatory, but also a little more jerky since the closed-loop tracking and attitude holding ability is reduced.
I ran into a similar issue with Kramnikopter and the solution was to make the motor controller's input filter, which reduces noise on the PWM input from the KK board, faster. The faster filter had less lag and so the closed-loop system could tolerate a bit more gain without becoming oscillatory. With the CineStar motors, though, a faster filter has the potential to ramp the duty cycle so fast that the overcurrent protection is tripped, or the current sensors are saturated, either of which will cause a controller fault.
In the test flight videos, the filter was a first-order discrete low-pass with a cutoff frequency of 5Hz. I will be trying some different types of filters, including a faster (10Hz) first-order low-pass and a non-linear slew rate limiter. I think the slew rate limiter might work best, since it attenuates large changes in input (ones that would cause overcurrent faults) but not small ones (like the closed-loop control signals).
For now, I got some good data on the operation of the ESCs. Here's the speed and current plots for the second of the two flight videos:

The hover speed is about 3700rpm for the 14x4.7SF props with a gross weight of about 4.76kg (10.5lb). The q-axis phase current for each motor is about 13A. I also installed a Watt Meter for the test hops. The average power draw for both flights was about 560W and the peak was about 630W. That's about 117W/kg average.
Here's a graph of the flux and phase currents vs. estimated rotor angle:

All the signals are in the right place, and it looks relatively clean. But there's definitely some bias in the flux estimate - it's shifted up by about 0.250mWb and the only thing keeping it from going further is the cap at 1.500mWb. This could be due to bias in the current sensors, so a self-zeroing start-up routine for them would probably help. Otherwise, a faster flux estimator filter would also hold the waveform in place better, at the expense of low-speed performance. So many tradeoffs... So much motivation to start working on Sensorless Gen2.
More testing to come.
No comments:
Post a Comment